Email alerts will allow users to send an email when
- Query encounters any error Or
- If any Dimension/Metrics matched the alert trigger.
We’ll now look at the step by step setup.
How to setup Email Alerts in DigiXport?
Step – 1: Save The Query
To save the query, simply check the “save query” box while importing the data to sheets. To know more about the setup, click here
Step – 2: Add Email Alert Trigger
To add an email alert trigger, click on the scheduling tab & then on “+Add Conditional Email Alerts”
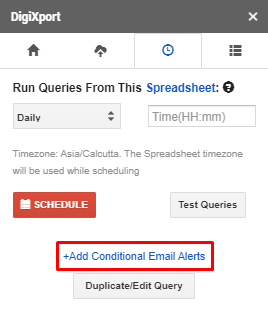
Once clicked, the popup will open up where you can see 3 sections
- Email Group
- Trigger Condition
- Email Content
Email Group:
In this section, the email group represents the collection of queries & their trigger condition that will trigger this email group.

You can name the email group anything you want but the important thing is to add saved queries to this group. You can do this by using regex. “.*” represents all the saved queries that will get added to the group.
NOTE: You can also hover over the link to check which queries are added to the group.
To add only one query to the group, you can simply type the name of the saved query in the box.
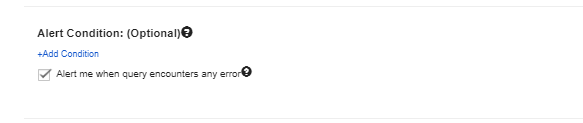
Trigger Condition:
In this section, you’ll need to add at least one trigger condition.
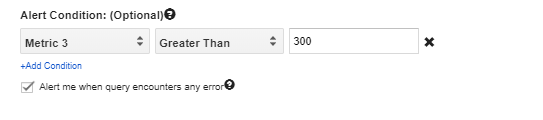
You can either:
- Check the box “Alert me when query encounters any error” or
- Select the metric & the condition.
When the checkbox is check, you’ll receive an email stating the cause of the error whenever the query in this group fails.
You can also specify an alert condition. For Eg: Say, Metric 3 is greater then 300 & if the query contains fields as Date, Campaign Name, Cost. Then the email will be sent when Cost is greater than 300.
Email Content:
In this section, you can simply enter the email content which will be sent when trigger conditions are met.

The email content is already pre-filled, so you can ignore this section if you don’t want to edit anything.
You can enter the
- Subject – Email Subject.
- To (Cc & Bcc) – The destination email address. For multiple addresses simply include commas. ([email protected], [email protected])
- Body – The email message to be sent to destination email(s).
You can also add Query Tags in the subject and the message body of an email such as
- {{currentDate}} – Date when the alert condition is triggered.
- {{alertCondition}} – The alert condition which resulted in email being sent.
- {{groupName}} – The name of the email group.
- {{sheetUrl}} – The url of the spreadsheet where this alert is triggered.
- {{sheetName}} – The name of the sheet where the alert is triggered
- {{sheetId}} – The id of the sheet where the alert is triggered
- {{queryName}} – The name of the query which caused the alert to trigger.
- {{queryId}} – The id of the query which caused the alert to trigger.
- {{startDate}} – The start date of the data which is being imported by the query.
- {{endDate}} – The end date of the data which is being imported by the query.
- {{headers}} – The headers of the data which is being imported by the query.
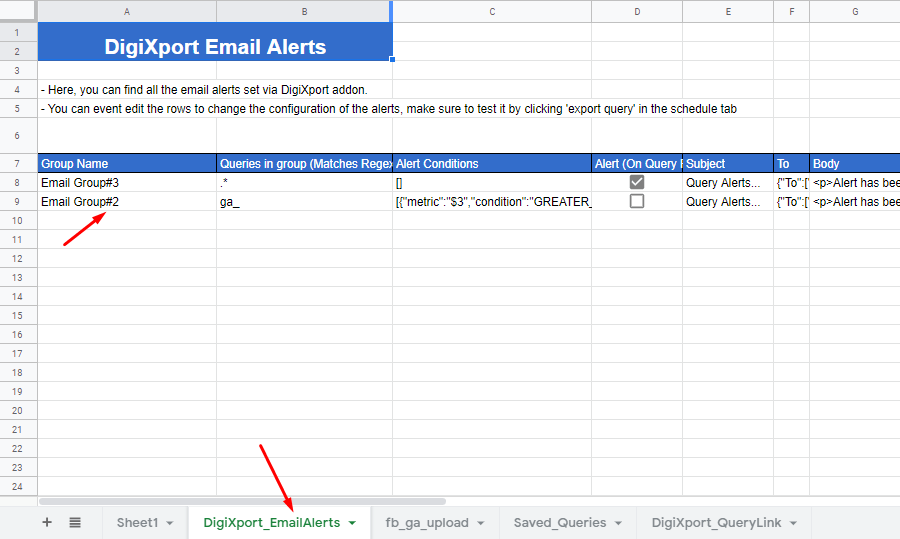
Once done, click on Create Alert.
An alert will get added to the sheet named “DigiXport_EmailAlerts” (this will be on the same spreadsheet where saved_queries sheet resides)
Step – 3: Test The Email Alert Setup
Finally, to send an email, you’ll need to run the queries using “Test Queries”. Make sure all the queries are active in the saved_queries sheet.
On clicking test queries, select the queries from the dropdown which are added to the email groups & then export them.
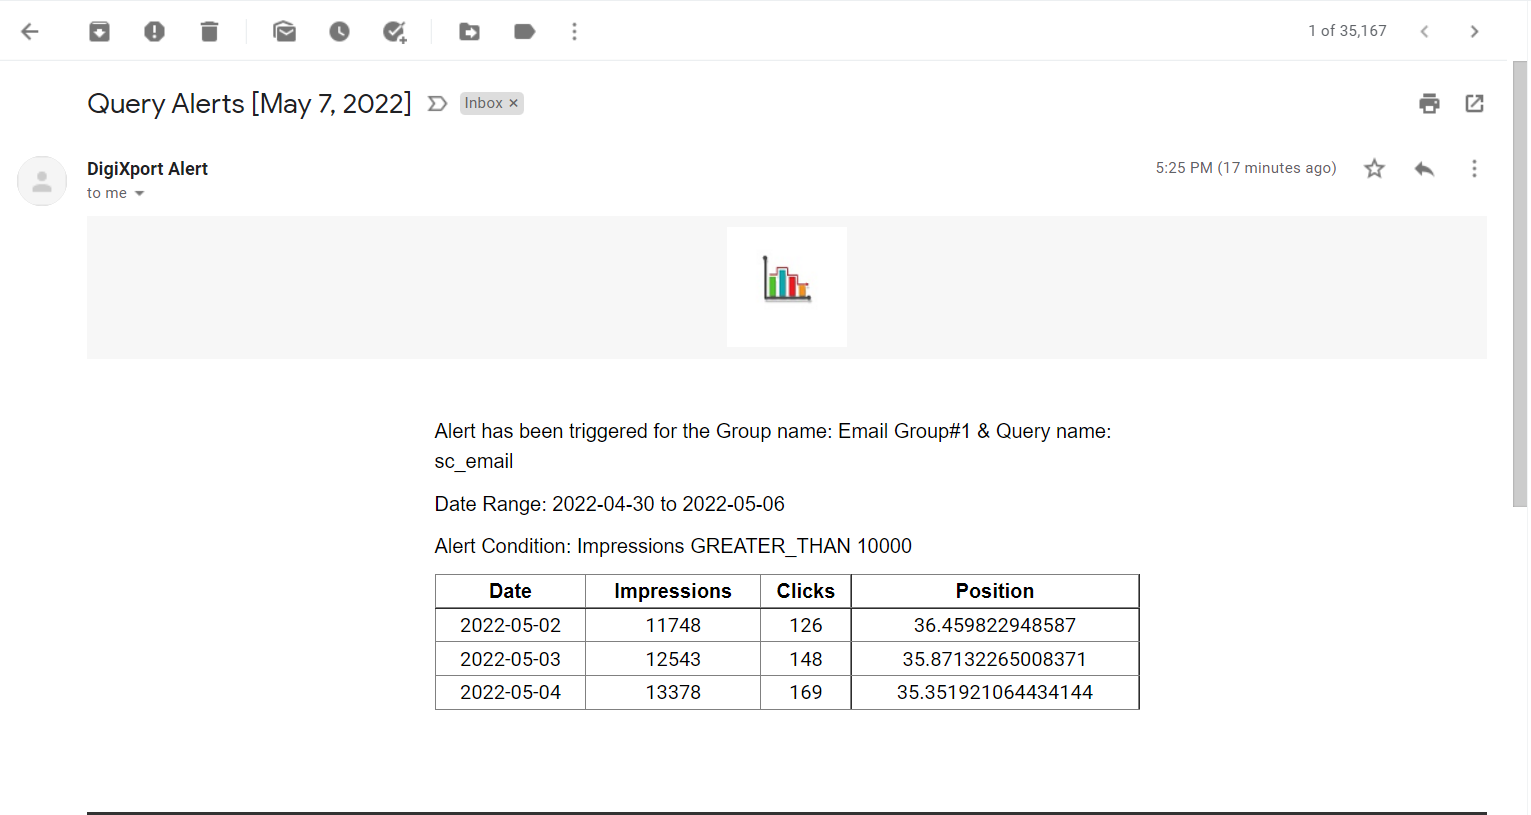
You’ll receive an email on the destination email provided only if the alert condition is matched.
EXAMPLES
Case 1: Send an email alert when any one of all the saved queries fail
For this setup, we are assuming you already have few saved queries.
- Click on “+Add conditional email alerts”.
- In the trigger condition, simply check the box named “Alert me when query encounters any error“
Rest everything is the same as mentioned in Step – 2 above.
- Click on create an alert.
Now whenever you receive an error in the query, you will receive an email.
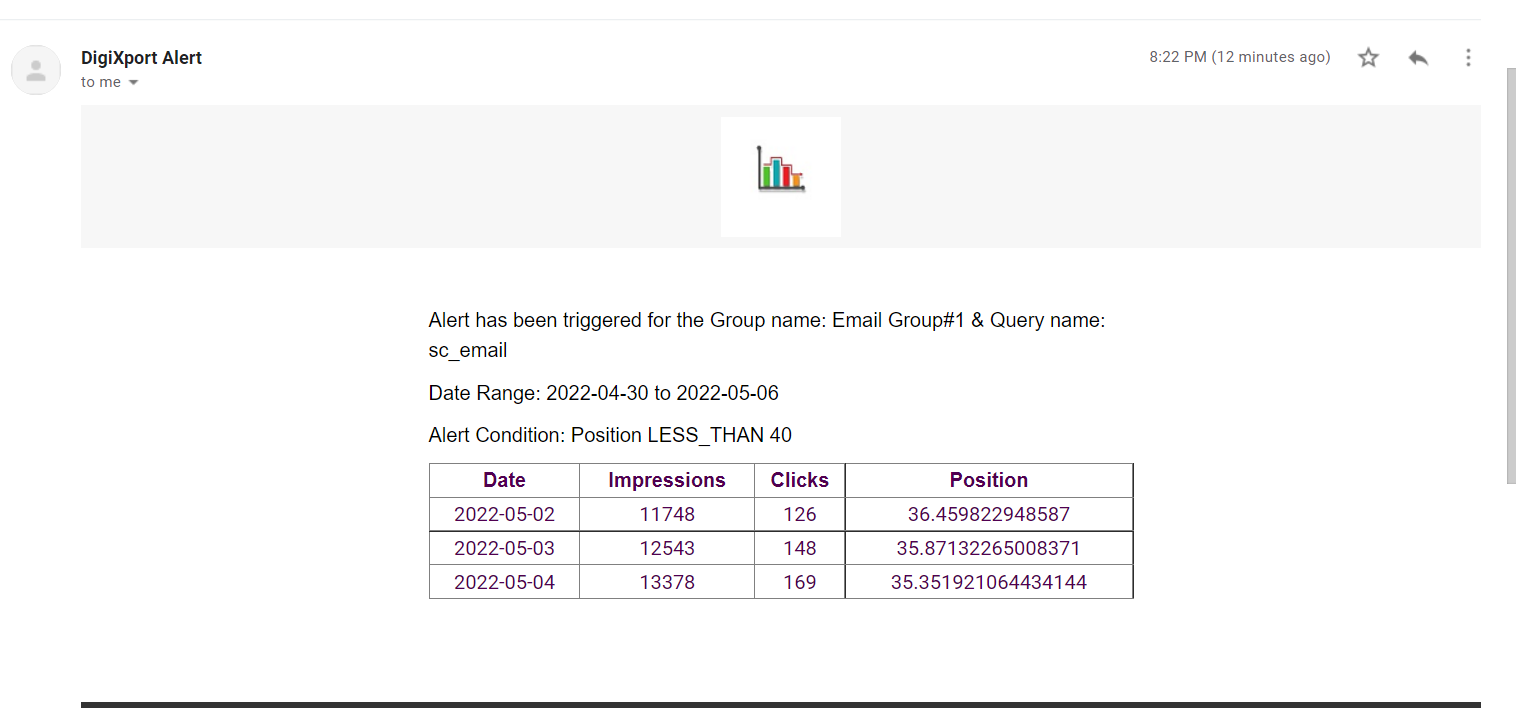
Case 2: Send an email alert when Position in Search console improves below 40
In search console data source, let’s say we want an email alert when our position metric goes below 40.
To create an alert
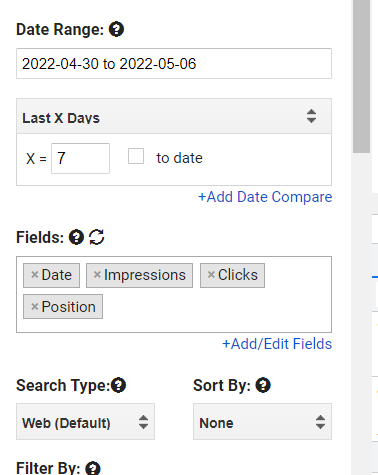
- Select search console data source & save the query with the fields Date, Impression, Clicks, Position.
- Go to 3rd tab, click on “+Add conditional email alerts”
- Enter the query name in the box Queries in the group. (We had named it as “sc_email”)
- Click on +Add Condition.
- Select Metric 4 (Position) Less Than 40.
- Click on Create Alert
![]()
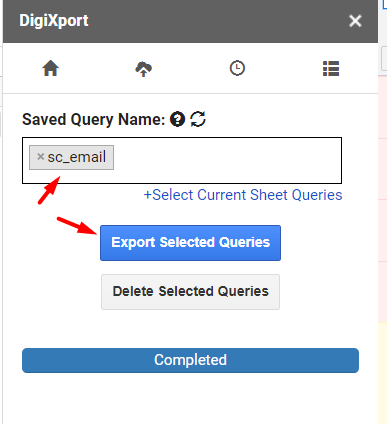
- To test the setup, you can go to test queries, select the query “sc_email” & click on Export Selected Queries.
- If the condition matches, you’ll receive an email alert
- Now you can simply schedule this query.
Case 3: Send an email alert when the daily cost exceeds certain amount (Say $300)
Let’s try to create a trigger condition based on the metrics.
- Assuming any data source, create & save the query with the headers Date, Cost. (splitby “date”)
- Now click on “+Add conditional email alerts”.
- Add the saved query name in the email group.
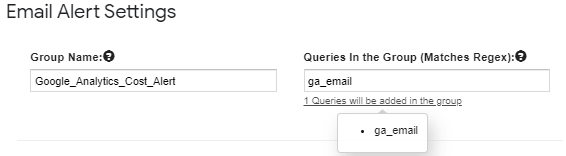
You can see that the query named “ga_email” was added the email group named “Google_Analytics_Cost_Alert”
Now moving on to alert condition,
- Select Metric 2 (which points to Cost, as it is the second metric in the header) greater than 300.
Also, if you want to get an email alert if the query fails, you can check the below box.

Rest everything is same as the Step – 2 mentioned above. Finally, click on create an alert.
To test this setup, click on test query & export that query.