In this article, we’ll be looking at the steps to import the Shopify data to google sheets.
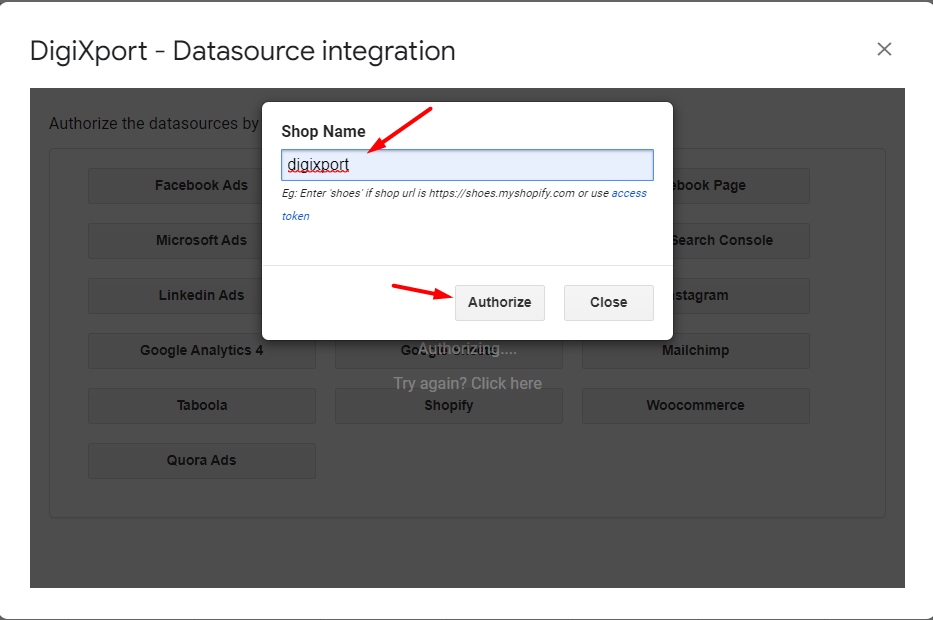
Assuming you have installed the DigiXport addon, we’ll look at how you can authorize the Shopify data source with one-click authorization method.
Let’s get started by following these 2 steps:
- Step – 1: One-click Authorization.
- Step – 2: Import the Shopify data.
Step – 1: One – Click Authorization.
- Open the addon sidebar & Click on +Add Account Or Simply click on the Extensions menu, then DigiXport > Add account.
- Click on Shopify.
- Enter shop name. (Note: Enter “shop” if shop name is shop.myshopify.com)
- Click Authorize.
Step – 2: Import the Shopify data.
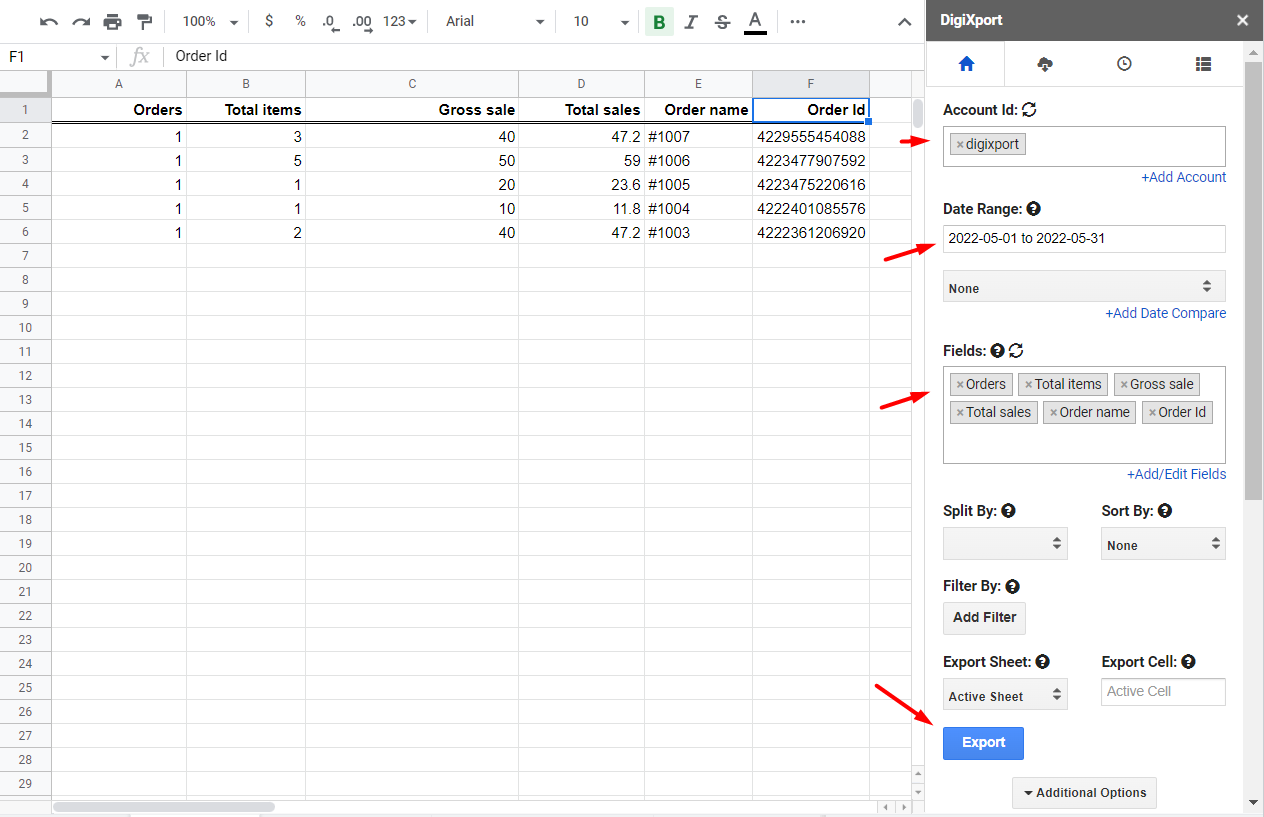
Once the authorization is completed, the accounts will be populated in the 1st tab of the addon. No you can:
- Enter the Account name (shop name)
- Select date range
- Select fields.
- Click on Export.
Important Points:
- Some fields such as sessions & its related fields are not available via the API. You can check for all the fields available on fields reference page.
- If you want to duplicate a query/queries for multiple Shopify accounts, then check the bulk query duplication feature.
- If you find any missing fields, contact us via our support email.

